
Topaz Signature Pad Set Up
Before setting up a Topaz Signature Pad device it is important to remove any previous Topaz software from the device first. Please see the Topaz Signature Pad Software Removal article for step-by-step instructions.
Set up the Topaz signature pad:
After you have cleared any previous Topaz software from the device, you are ready to complete the setup.
- Download the latest version of SigWeb by clicking on the following link.: http://www.topazsystems.com/software/sigweb.exe
NOTE - If the file does not automatically save to your local Downloads folder, save the file where you can access it. - Double-click the EXE file to start the installation.
- Follow the prompts to complete the setup and installation process.
- Restart your computer.
- Press Ctrl+F5 to refresh your browser.
- Once complete, test the setup by navigating to the Topaz Signature Tablet Demo site: https://www.sigplusweb.com/sigwebtablet_demo.htm
If the test is successful the signature pad is ready to use.
BASIC TROUBLESHOOTING:
This section covers self-troubleshooting steps you can follow if:
- the Signature Pad does not work with the demo site
- the Signature Pad does work with the demo site but does not work when taking a payment
- Firefox Browser - Ensure you are using Firefox as your browser with the Signature Pad.
NOTE - The Topaz Signature pads support both Chrome and Firefox. However, the Topaz software is more stable and works more consistently with Firefox. If you are using
Chrome and experience problems with the Signature Pad try using Firefox. - Refresh the Browser -
- Tapping the F5 key at the top of your keyboard.
- Clicking the circular arrow in the top left corner of the browser window.
- One Demo Instance - Make sure you only have the demo site open once.
- Check the USB Connection - Making sure the device's USB cable is plugged in securely.
- Try a Different USB Port - Move the Signature Pad's USB cable to another port.
- Reboot the Computer - If you haven't already, restart your computer.
- Check the IP address - Make sure the host file is referencing the correct IP address.
NOTE - See the Check the IP Address section below for step-by-step instructions. - Verify the Software was Installed Correctly
NOTE - If you are unsure, follow the procedures to completely remove the software and reinstall it.
Check the IP Address:
- Type cmd in the Search Bar.

- Press Enter.
- The Command Prompt DOS window will open.

- Type ping tablet.sigwebtablet.com into the command line.
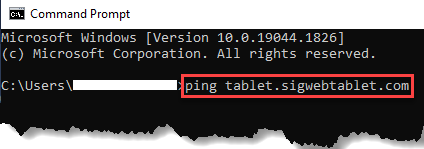
- Press Enter.
- Verify the IP displayed is: 127.0.0.1
NOTE - If that IP is not displayed, edit the host file by following the steps below.
Edit the Host File:
If you need to edit the host file follow these steps.
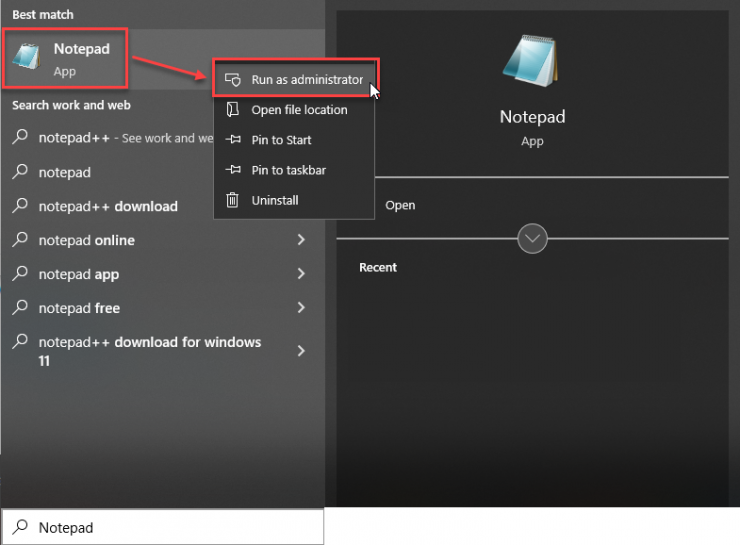
- Type Notepad in the search menu.
- Right-click on Notepad > app.
- Click Run as administrator.
NOTE - If you do not have administrator rights on your computer contact your local support team for assistance.
- Open the File menu.
- Click Open.
- Enter C:\Windows\System32\drivers\etc\hosts in the File Explorer navigation bar.

- Open file 127.0.0.1.
- Find the line toward the bottom of the file containing 127.0.01.
- Modify the line by doing the following:
- Remove the hashtag (#) from the beginning of that line.
- Change "localhost" to tablet.sigwebtablet.com (no quotation marks).
- Open the File menu.
- Click Save As.
- Change the Save as type: to All Files.

- Click Save.
- Try testing the Signature Pad again.