Add, Delete, or Edit Tags
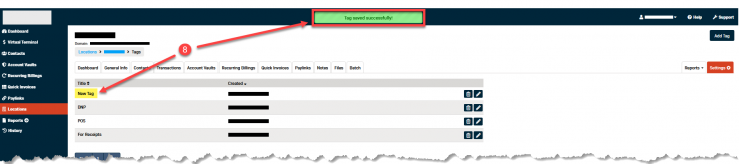
Add a New Tag
- Select Locations from the left-hand menu.
- Click on the Location Name.

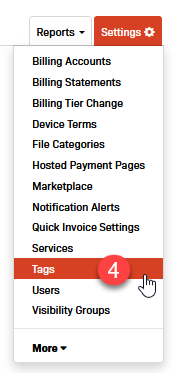
- Click the Settings button on the right side of the screen.

- Select Tags from the drop-down menu.
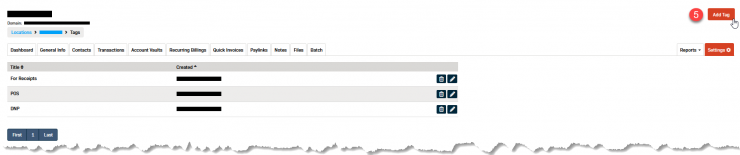
- Click the Add Tag button in the upper right-hand corner of the screen.
- Enter the tag name into the Title field.
- Click the Save button.

- If the tag is saved, the following two confirmations will appear.
- A message box at the top of the screen.
- The new tag will appear in the tags list.
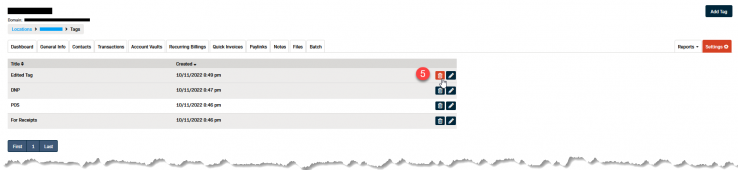
Delete a Tag
- Select Locations from the left-hand menu.
- Click on the Location Name.
- Click the Settings button on the right side of the screen.
- Select Tags from the drop-down menu.
- Click the Delete button (the trashcan icon) on the right side of the tag's row.
- Click Ok in the confirmation pop-up box to delete the tag.
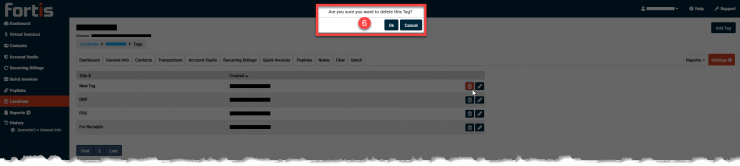
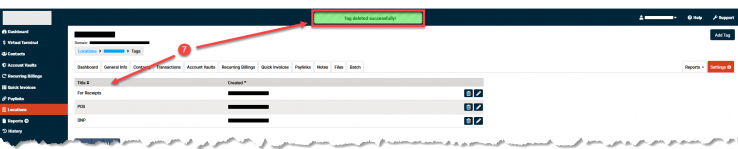
- If the tag is deleted, the following two confirmations will appear.
- A message box at the top of the screen.
- The tag will no longer appear in the tags list.
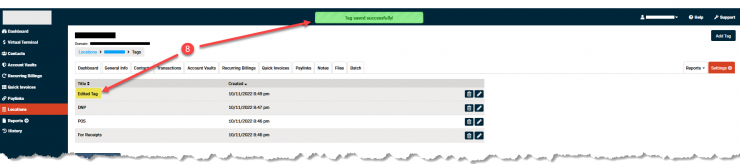
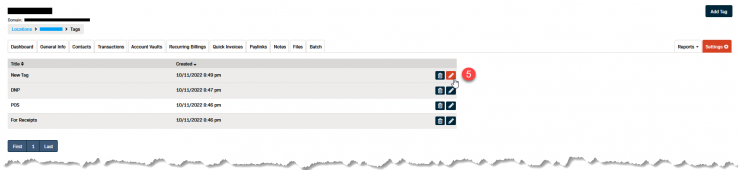
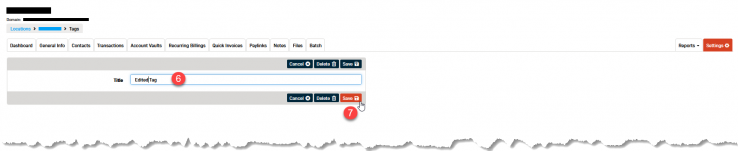
Edit a Tag
- Select Locations from the left-hand menu.
- Click on the Location Name.
- Click the Settings button on the right side of the screen.
- Select Tags from the drop-down menu.
- Click the Edit button (the pencil icon) on the right side of the tag's row.
- Edit the tag name into the Title field.
- Click the Save button.
- If the tag is saved, the following two confirmations will appear.
- A message box at the top of the screen.
- The edited tag will replace the original in the tags list.