Reports - Transactions
The Transactions report displays all the transactions processed by the location(s) you can access. The fields directly under the column headings allow the user to filter the results of the report either by:
- Typing a value in the field
- Selecting options from a drop-down menu (indicated by a black down arrow)
Note: By default, the Transactions report displays any transactions processed Today by all the location(s) connected to your user account. Earlier transactions can be viewed by using the Transaction Date menu (see below).
Article Contents
- Opening the Transactions report
- Filtering the report results
- Additional report actions including:
- Adding and Removing columns
- Reordering Columns
- Saving a customized report
- Deleting a customized report
- Other report actions
Open the Transactions Report
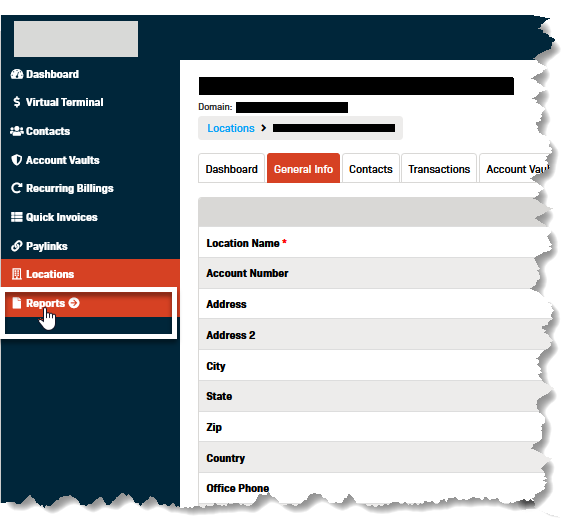
- Select Reports from the left-hand menu.
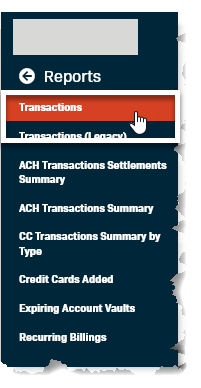
- Select Transactions from the left-hand Reports menu (without the 'Legacy' suffix).
- The report will open to display any transactions that have been processed by the location(s) connected to your user account today.
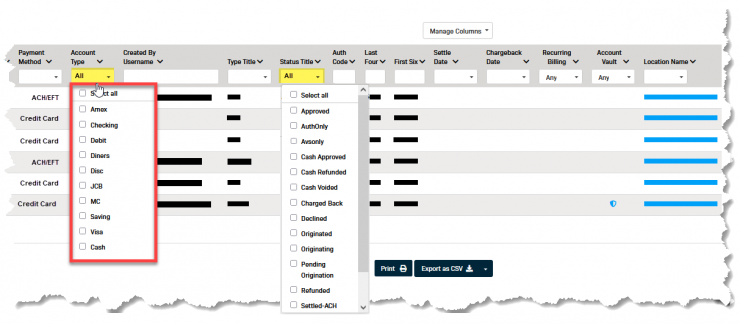
Filtering the Transactions Report
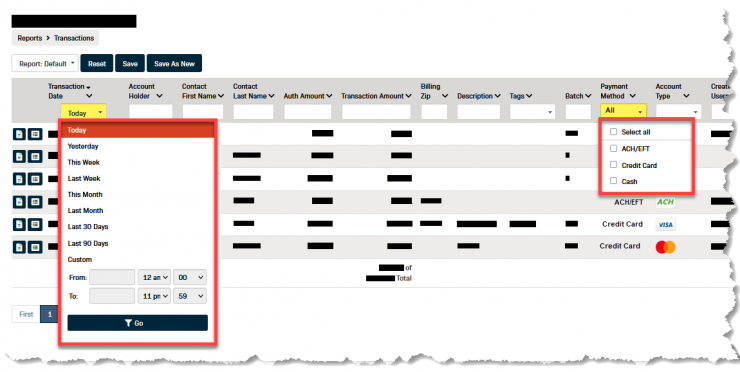
The following screenshots show some of the most common Transactions Report filters.
Transaction Date & Payment Method
Account Type & Status Title
Additional Report Actions
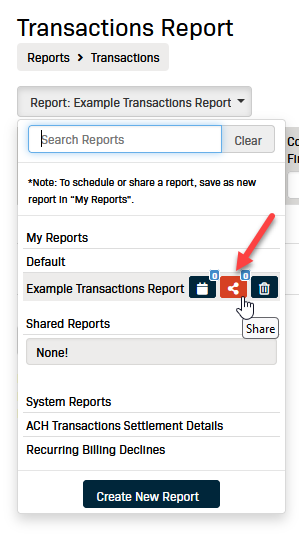
The Transactions report allows users to create and save customized reports. Saved reports can also be scheduled and shared.
Customizing the Report
In addition to applying filters to the Transactions report you can also:
- Select which columns are displayed - Add/Remove
- Set the order of the columns - Drag-and-Drop
Add Columns
Use the Manage Columns menu to add additional columns to the report.
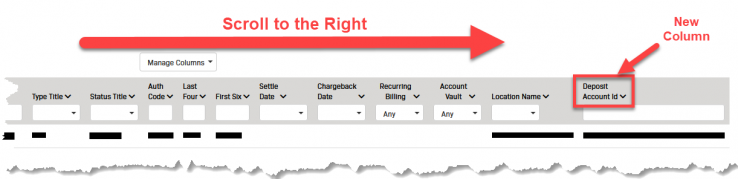
Note: Newly added columns pull in at the end (far right) of the report,
- Click the Manage Columns button to open the menu.
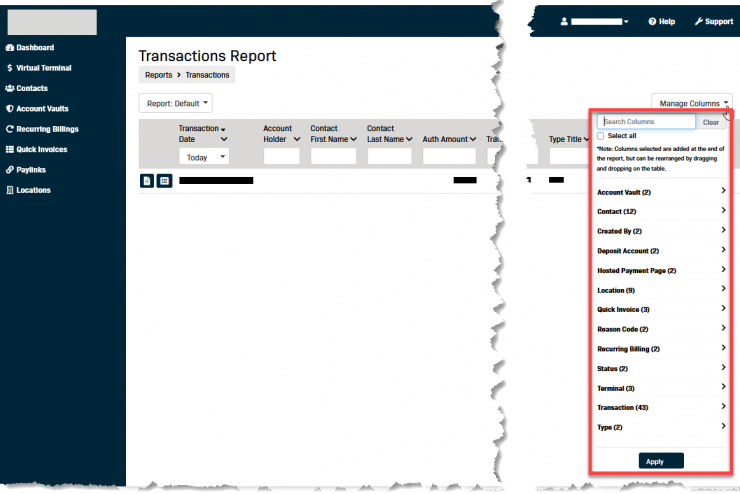
- Check the box next the the column name(s) you would like to add.
- Click the Apply button.
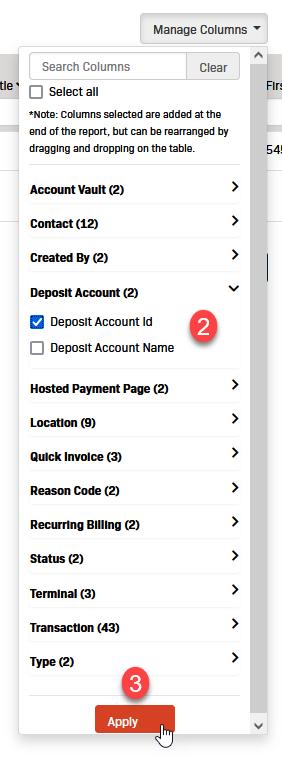
- Scroll completely to the right to view the additional column(s).
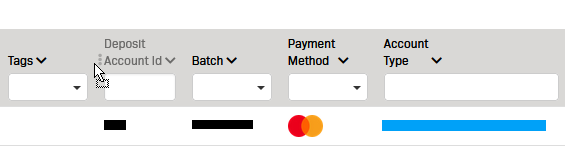
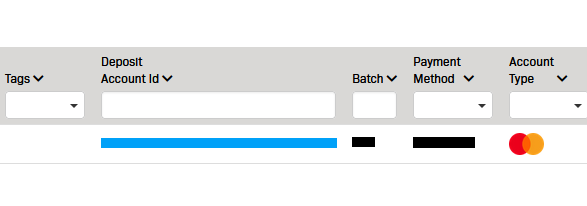
Re-order Columns
- Position your cursor over the column header of the column you want to move.
- Click and hold the left mouse button until the column name becomes greyed out.
- Drag the column to the new position.
- Release the mouse button to drop the column into position.
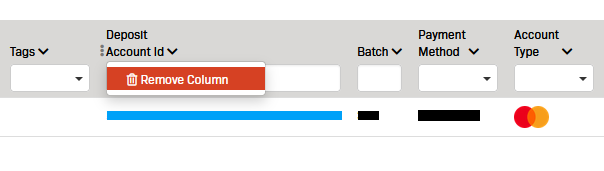
Remove Columns
- Click on the Column Name to open the drop-down menu.
- Click Remove Column.
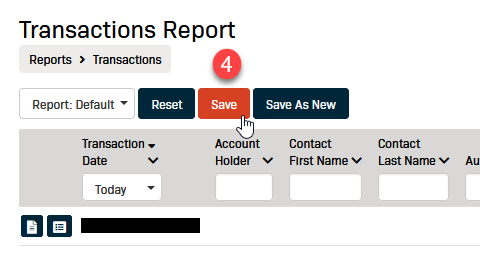
Save a Customized Report
- Click the Report: Default button to open the menu.
- Click the Create New Report button.
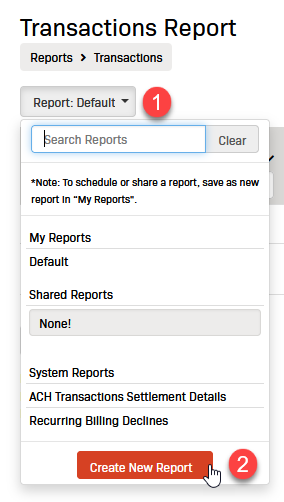
- Make the desired selections to customize the report for your needs.
- Filters
- Columns
- Click the Save button to create your new report.
- Enter a Title for the report in the pop-up box.
- Click the Save button in the bottom-right of the pop-up box.
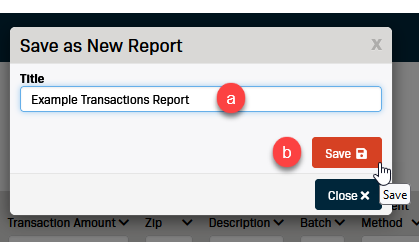
- A message box will appear at the top of the screen to confirm that the new report has been saved successfully.

Delete a Custom Report
- Click the Report: button to open the drop-down menu.
- Find the report you would like to delete under the My Reports header.
- Click the button with a trashcan icon located to the right of the report name.

- Click the OK button in the pop-up box to confirm you want to delete the report.
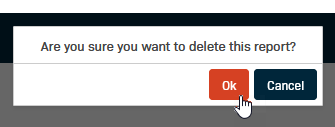
- A message box will appear at the top of the screen to confirm that the report has been deleted successfully.

Other Report Actions
Contact Customer Service for assistance with these functions.
Schedule a Report
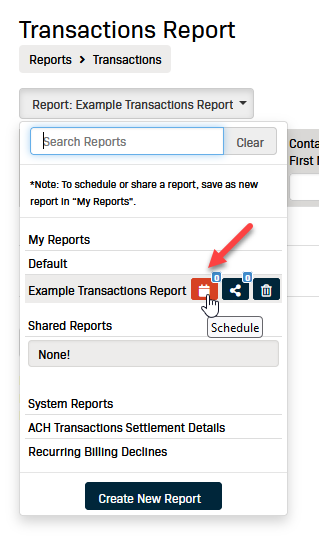
Share a Report