Set Up a New User
There are four parts to setting up a new portal user:
- Add a User
- Setup User Roles
- Setup Preferences (Email Alerts)
- Create or Reset a Password
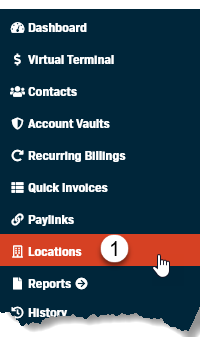
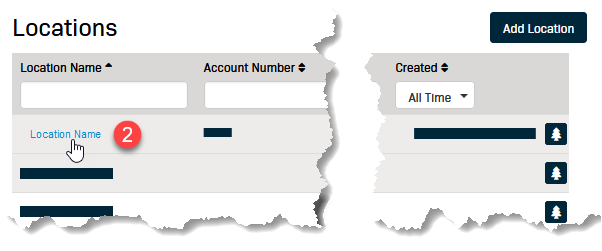
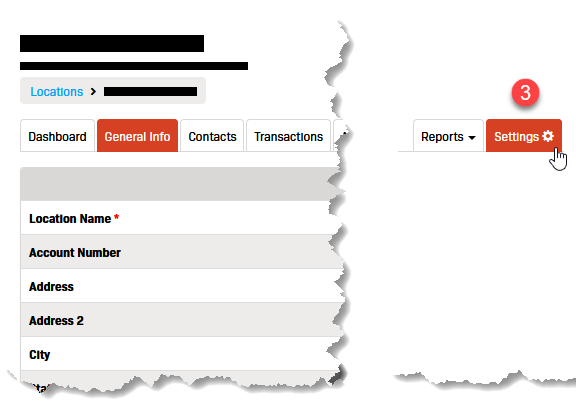
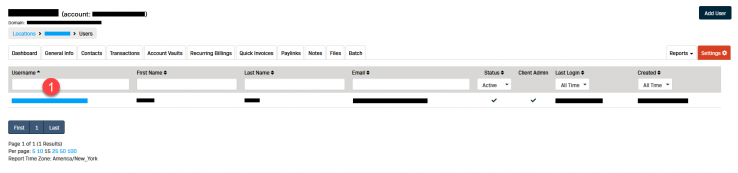
Add a User
- Select Locations from the left-hand menu.
- Click on the Location Name.
- Click the Settings button on the right side of the screen.
- Select Users from the drop-down menu.
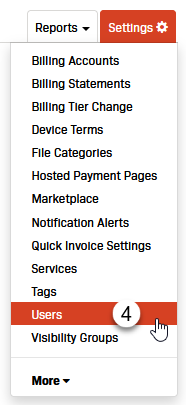
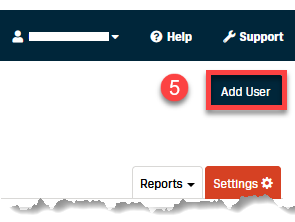
- Click the Add User button in the upper right-hand corner of the screen.
- Click on one of the following tabs to open the form:
- Add New User - See the instructions below
- Add Existing User - See the instructions below
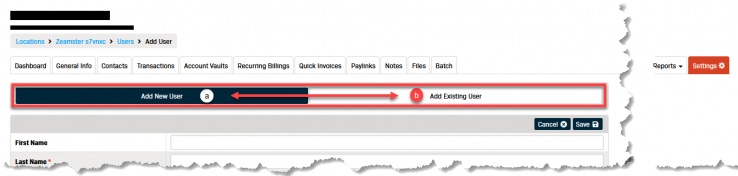
Add New User
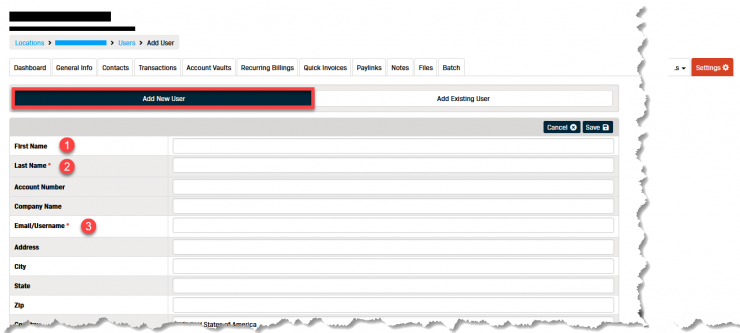
To add a new user complete the form.
Note: Required fields are marked with a red asterisk (*).
- Enter the user's First Name.
- Enter the user's Last Name.
- Enter the user's email address in the Email/Username field.
- Select the correct Timezone from the drop-down menu for the user's location.
- Select the appropriate User Type from the drop-down menu.
The options are:- Location Admin - These users have full portal permissions.
- Location User - These users have portal permissions set by a Location Admin.
- The remaining optional fields can be completed based on business requirements.
- Click the Save button.
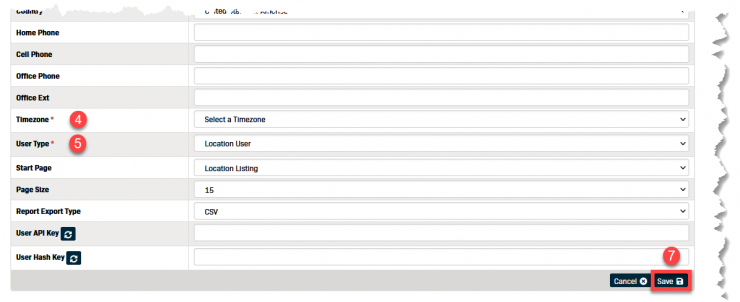
Note: If you're using an integrated solution, you may also need to generate credentials (User API Key or User Hash Key) to plug into the integrated software in order to sync users across systems.

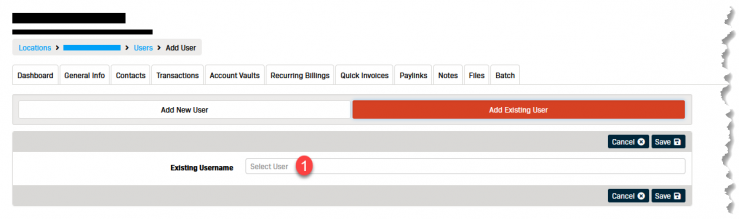
Add Existing User
To add an existing user they must be able to be viewed from another assigned location.
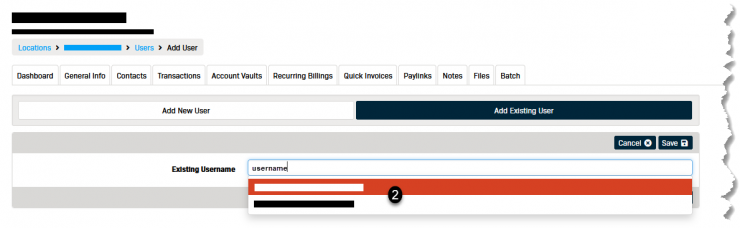
- Start typing the username in the Existing Username field.
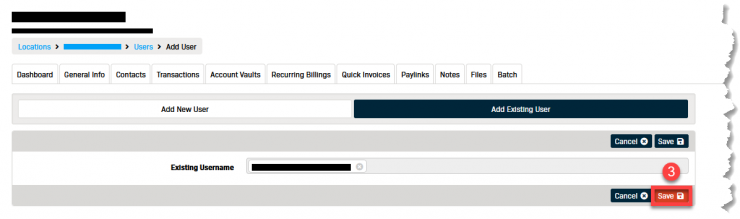
- Select the correct user from the list that appears.
- Click the Save button.
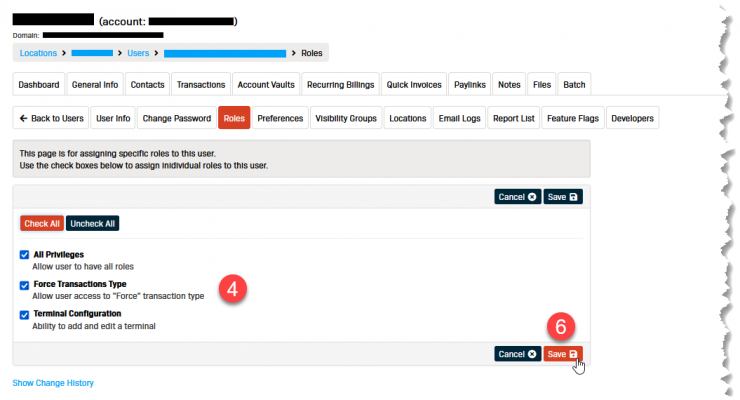
Setup Roles
From the Users menu:
- Click on the Username of the user you want to set roles for.
- Select the Roles tab.
- Click the Edit button.
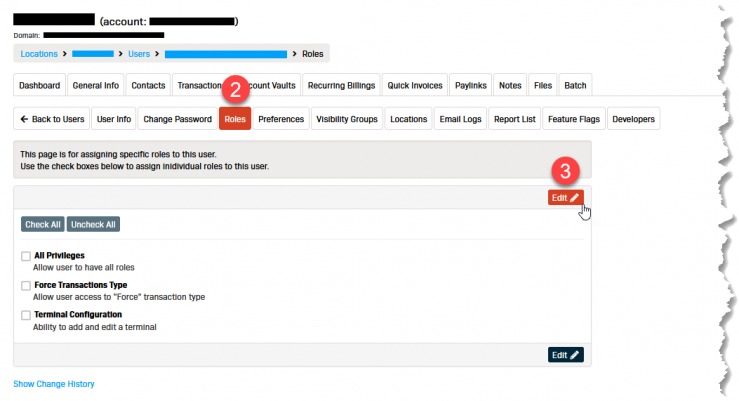
- Select the appropriate roles for the user's type.
- A blue check mark will appear next to the role to confirm it is selected.
Note: If the user is a Location Admin, click the Check All button to select all of the roles. - Click the Save button.
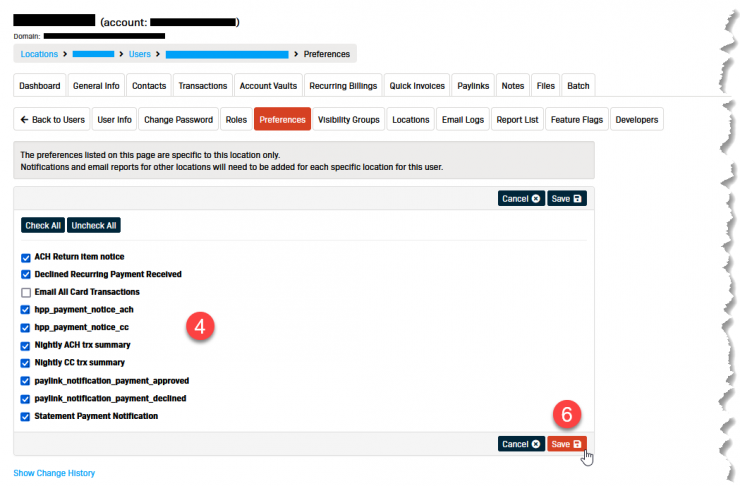
Setup Preferences
From the Users menu:
- Click on the Username of the user you want to set roles for.
- Select the Preferences tab.
- Click the Edit button.
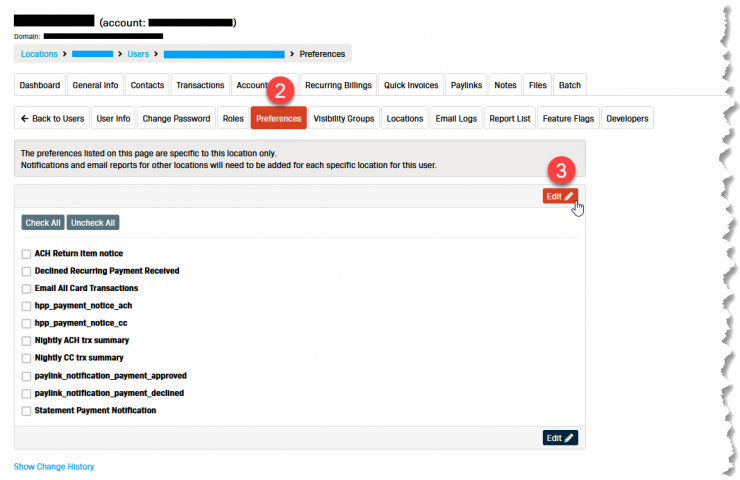
- Select the appropriate preferences for the user's type.
- A blue check mark will appear next to the role to confirm it is selected.
Note: For new users, check all the preferences except Email All Card Transactions. - Click the Save button.