
Auto Batch Close Times - Set and Delete
The payments system allows users to customize the time(s) each day that credit/debit card transaction batches are automatically closed and submitted for processing. This article outlines the process to add an Auto Batch Close Time as well as the steps to delete a batch closure time that is no longer needed.
Notes:
- Auto batches are specific to:
- Location - If you have access to multiple locations you will need to set up batch close times for each one.
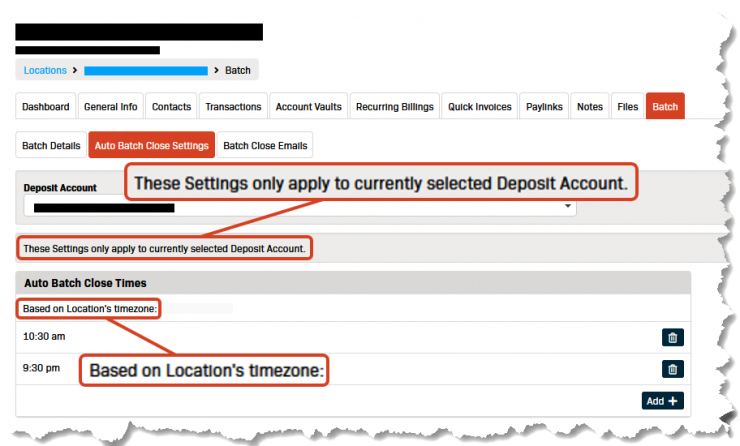
- The batch close times will be in the timezone selected for the location.
(i.e., If your location is set up for the Eastern timezone the batch close time selected will be Eastern time.)
- The batch close times will be in the timezone selected for the location.
- Deposit Account - Auto batch closure times can be linked to only one deposit account. If you have
multiple accounts, set up the batch closures for each account separately.
- Location - If you have access to multiple locations you will need to set up batch close times for each one.
- The system supports multiple auto batch close times for each location/deposit account.
Set an Auto Batch Close Time
If you have access to multiple locations, you will need to select the correct location where the Recurring Billing should be created.
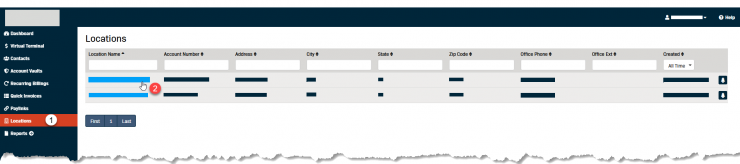
- Select Locations from the left-hand menu.
- Click on the Location Name.
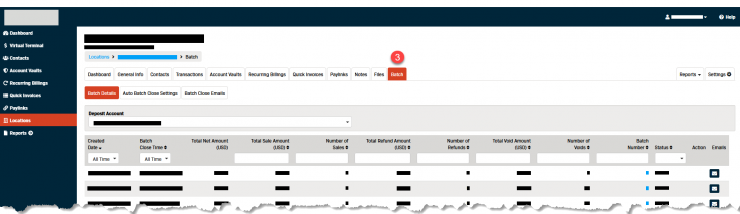
- Click on the Batch tab.
- Click on the Auto Batch Close Settings sub-tab.
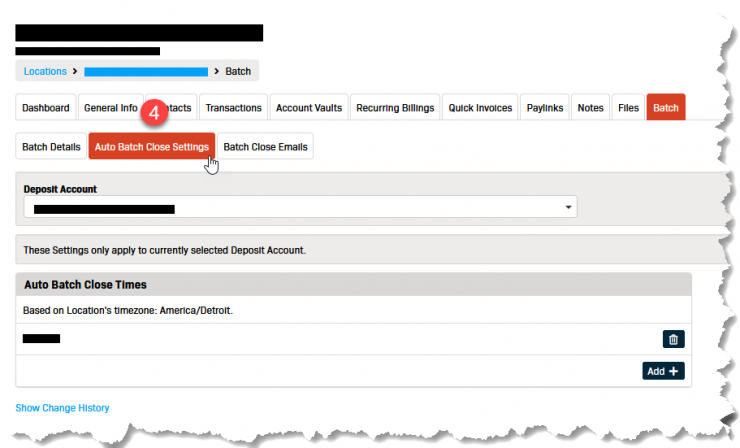
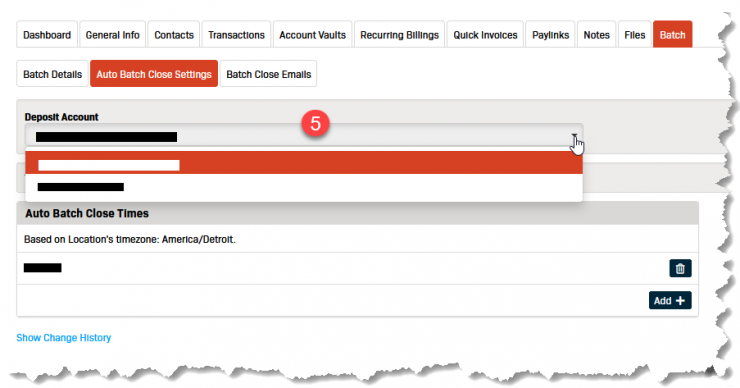
- If you have multiple Deposit Accounts select the correct one from the drop-down menu.
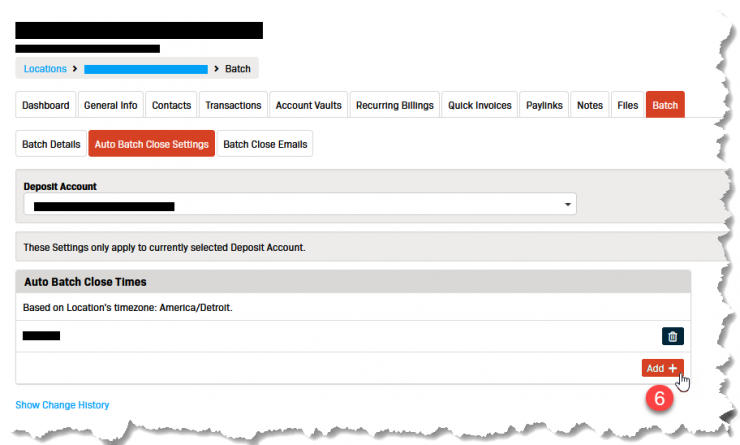
- Click the Add button.
- Select the time you want to automatically close the batch at using the drop-down menus.
- Hours
- Minutes
- AM/PM

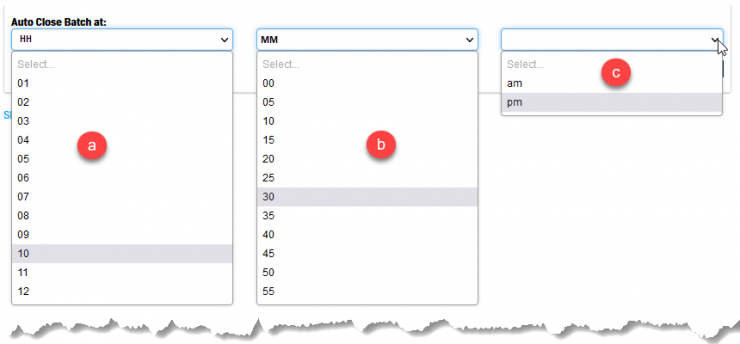
- Confirm the correct time is populated in the Auto Close Batch at: fields.
- Click the Add button again to save the close time.

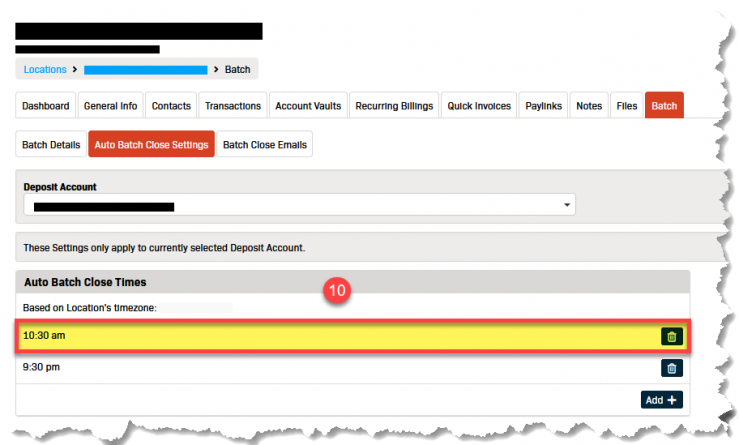
- The new time will appear in the Auto Batch Close Times list.
Delete an Auto Batch Close Time
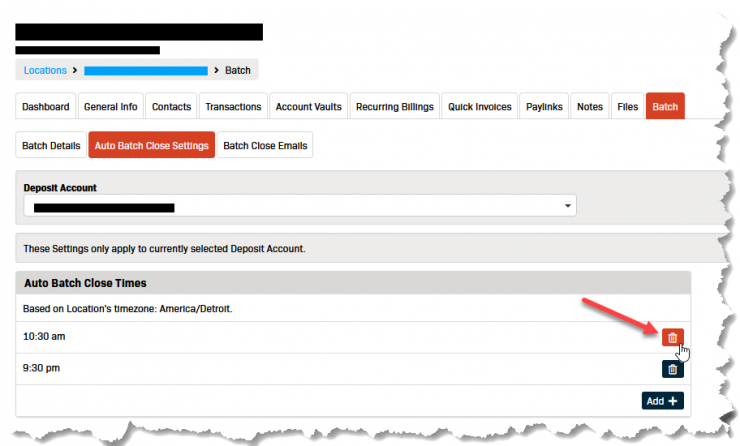
- Navigate to the Auto Batch Close Settings sub-tab with the time you want to remove.
- Click the trashcan icon to the right of the auto batch close time you no longer want.
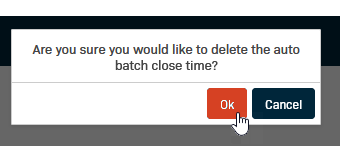
- Click the Ok button in the pop-up box to confirm you want to delete time.
- A message box will appear at the top of the screen confirming the batch close time was successfully deleted.
